Uart2 Serial Console
Instructions work for the MitySOM-AM62x, MitySOM-AM62a, and MitySOM-AM62p
Prerequisites
- USB 3.3V serial cable with broken out pins: https://www.digikey.com/en/products/detail/ftdi-future-technology-devices-international-ltd/TTL-232R-RPI/4382044
- A host system with a USB connection. (Windows or Linux PC)
- Run through setting up a serial console.
Step 1: Board Setup:
- Connect the USB serial cable with broken out pins to the following ports on the "P3 Expansion"
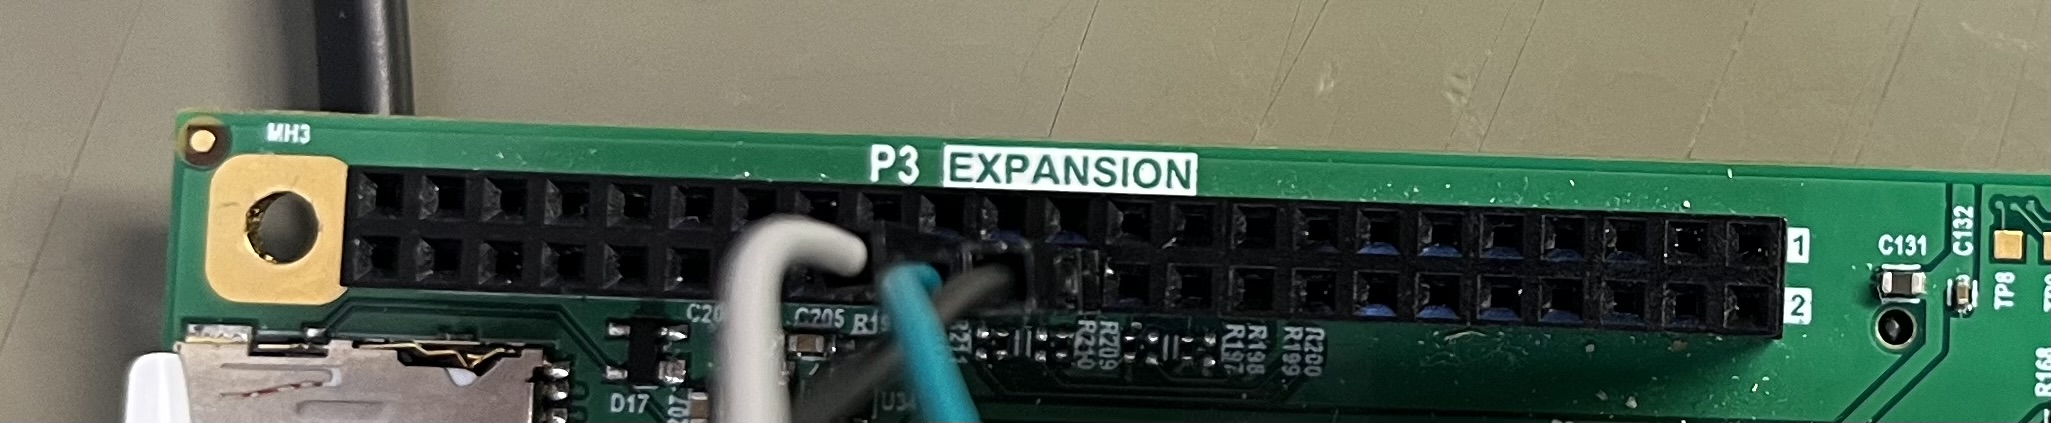
- Pin 24 GND (Black Cable)
- Pin 26 UART2_RXD (Green Cable)
- Pin 28 UART2_TXD (White Cable)
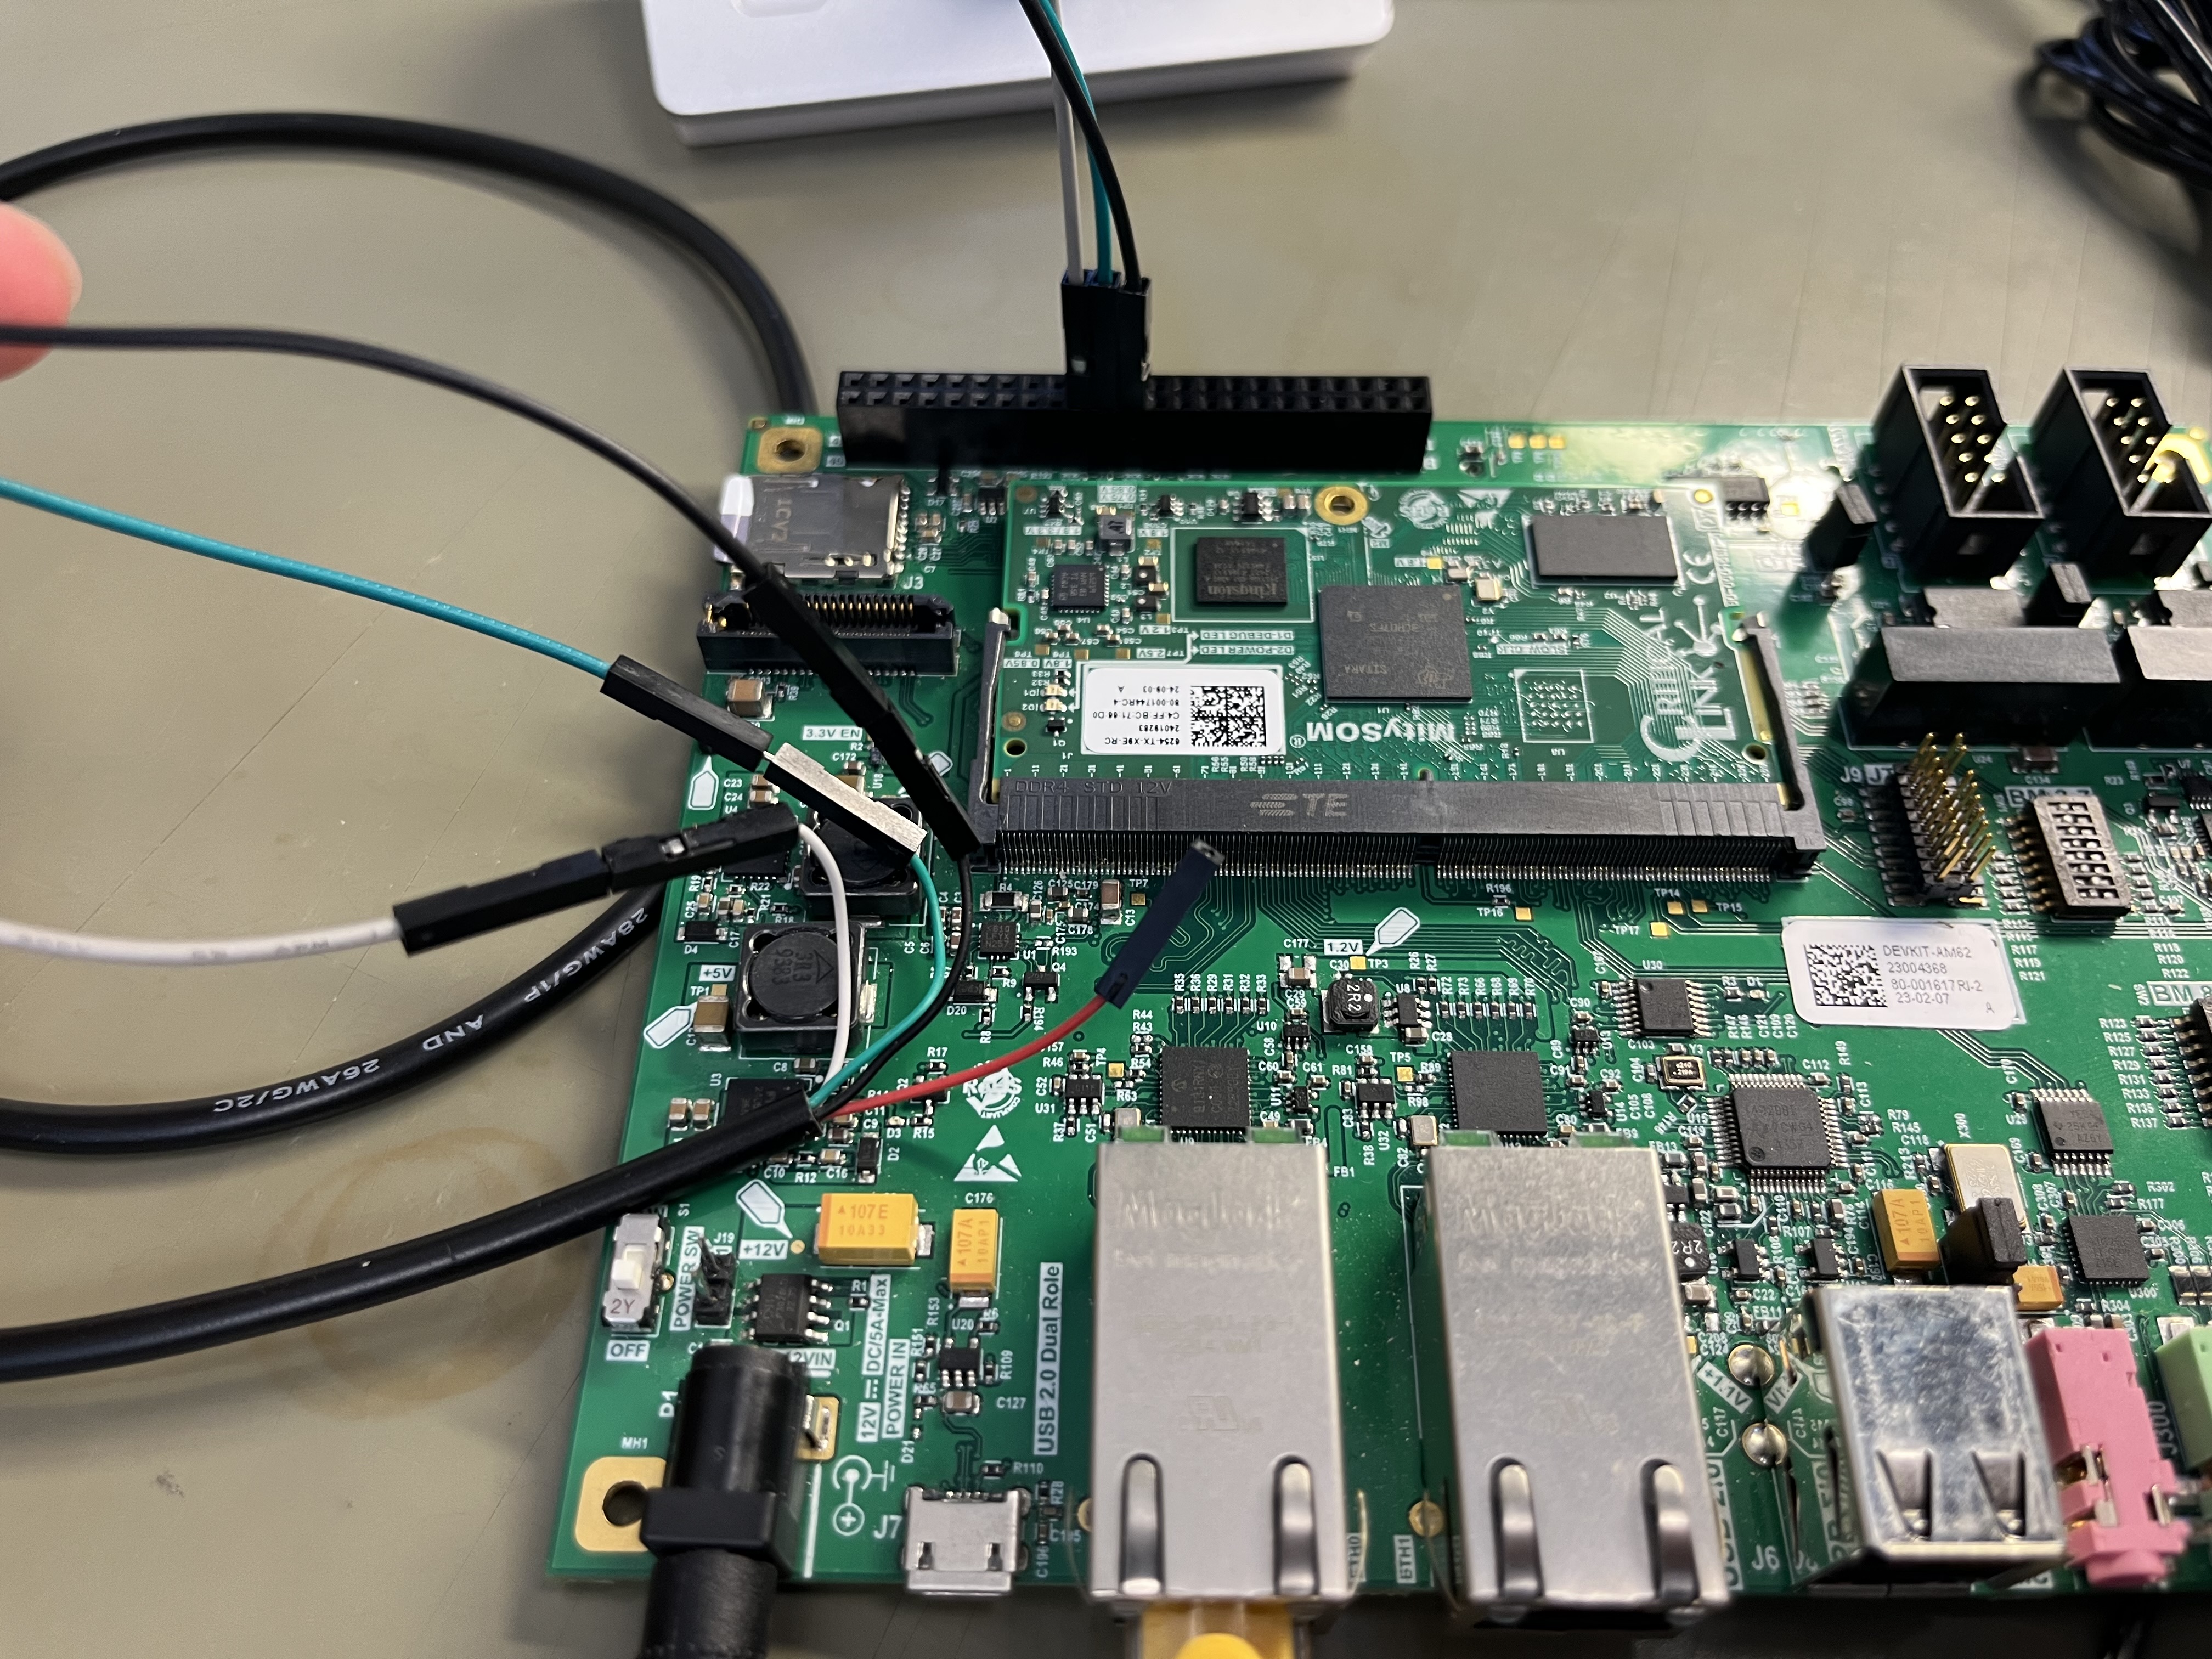
- Another angle
Step 2: Open the new Serial Console
- Check which usb the serial cable connected to
$ sudo dmesg
[84700.175119] pl2303 3-2.4.4.3.1:1.0: pl2303 converter detected
[84700.203234] usb 3-2.4.4.3.1: pl2303 converter now attached to ttyUSB2
- Using your preferred serial console (putty, microcom, teraterm) configure the serial port found in the previous step as: 3000000 baud rate.
- launch the console
Step 3: Update the Code in Linux-ti Project
- In arch/arm64/boot/dts/ti/k3-am62x-mitysom-devkit.dts
AM62X_IOPAD(0x0198, PIN_INPUT_PULLDOWN, 7) /* (A19) MCASP0_AXR2.GPIO1_8 */
AM62X_IOPAD(0x01b4, PIN_INPUT_PULLDOWN, 7) /* (A13) SPI0_CS0.GPIO1_15 */
- AM62X_IOPAD(0x01d0, PIN_INPUT_PULLDOWN, 7) /* (A15) UART0_CTSn.GPIO1_22 */
- AM62X_IOPAD(0x01d4, PIN_INPUT_PULLDOWN, 7) /* (B15) UART0_RTSn.GPIO1_23 */
AM62X_IOPAD(0x01d8, PIN_INPUT_PULLDOWN, 7) /* (C15) MCAN0_TX.GPIO1_24 */
AM62X_IOPAD(0x01dc, PIN_INPUT_PULLDOWN, 7) /* (E15) MCAN0_RX.GPIO1_25 */
AM62X_IOPAD(0x01f0, PIN_INPUT_PULLDOWN, 7) /* (A18) EXT_REFCLK1.GPIO1_30 */ /* (D16) EXTINTn.GPIO1_31 Used on SOM for PMIC interrupt */ >; }; + + main_uart2_pins: main-uart2-pins { + pinctrl-single,pins = < + AM62X_IOPAD(0x1d4, PIN_OUTPUT, 3) /* (B15) UART2_TXD Console */ + AM62X_IOPAD(0x1d0, PIN_INPUT, 3) /* (A15) UART2_RXD Console */ + >; + }; + }; + + &main_uart2 { + pinctrl-names = "default"; + pinctrl-0 = <&main_uart2_pins>; + status = "okay"; + };/ { + aliases { + serial10 = &main_uart2; + }; vcc_12v: vcc_12v {
Note: You will have to update AM62X_IOPAD for your respective SOM
Step 4: Check Uart2 Functionality
- Build your changes and copy them to your mmc device (ex. SD card)
- Boot to the linux kernel and run the following command
root@mitysom-am62x:~# dmesg | grep serial
[    1.480682] 2800000.serial: ttyS2 at MMIO 0x2800000 (irq = 238, base_baud = 3000000) is a 8250
[    1.511687] 2820000.serial: ttyS10 at MMIO 0x2820000 (irq = 240, base_baud = 3000000) is a 8250
[    3.288480] systemd[1]: Created slice Slice /system/serial-getty.
- As you can see "ttyS10" is now setup and ready for serial communication
Step 5: Run Microcom Command
- Create a serial connection from uart2 to your local computer
root@mitysom-am62x:~# microcom -s 3000000 /dev/ttyS10
- Try typing "Hello World" and you should see it print out on the new serial console you opened in step 2.
Summary
This wiki page has demonstrated the following:- Configuring the uart2 serial port.
- Creating a serial connections between the uart2 serial port and the connected local device.
Go to top

